Book Blog Hop & Giveaway – Recreating Antique Quilts

I was thrilled to be asked by Wendy Sheppard to take part in this blog hop introducing her book, “Recreating Antique Quilts, Re-envisioning, Modifying and Simplifying Museum Quilts.” Click on the button above and you will be taken to Wendy’s … Continue reading

Baby X’s and O’s

A finish! Well, almost a finish. The label still has to be added, but other than that Baby X’s and O’s is a finish. I made it some time ago with the Inklingo 7.5″ Spool or Japanese X collection. Now hold … Continue reading

My First Applique Quilt

While I work on the red and white quilt, I thought I’d revisit some older quilts. Tuesday we took this one out to the roof garden for a photo. It was made about 12 years ago — I didn’t date the label and have no notes about it anywhere, so am just guessing. It was my first appliqué quilt and was based on a pattern in a McCall’s Vintage Quilts magazine, although I did amend it somewhat. The blocks are 15″ and the quilt finished at about 66″ by  81″. It was pieced, appliquéd and quilted by hand. The only time the sewing machine was used was to attach the binding.

When I look at it now I get a laugh out of the fabrics – I mixed up everything in it. Muslin was used for the background. There are batiks, ’30s prints, florals, checks, you name it in the plates. I wasn’t following any rules about what goes with what. It was just what appealed to me and I thought played nicely together. I remember using a dinner plate to cut the corners of the quilt so that they’d be curved. That was my first time working with a bias binding and I loved it! In fact, I’ve pretty much always gone for bias bindings ever since then.

As this more current (and still being quilted) quilt that I’ve called Ferris Wheel shows, Dresden Plate quilts are something to which I’m really drawn. I’m contemplating a third one now. But now they are so much easier. No more tracing templates over and over. I just print my shapes with the Inklingo Dresden Plate collections. I was playing with some design ideas last night for another one, using EQ, and I think that it’s not too far off. First of course, I have to finish the red and white and my Tiffany lamp New York Beauty (which won’t be very big).  And start the quilt I’ve designed using the fabrics I won in the Love the Lines contest. And finish Pickled Ladies. And finish … oh, okay. The list is endless.

Baxter doesn’t care what else I make. He has his quilt now. Just about every evening he curls up on it.

I’m Seeing Circles

Some wonderfully soft pastel circles.

Some circles in richer, darker colours.

I had a box full of charm packs in various lines. A few years ago I appliquéd circle after circle after circle. And then they sat. And sat. I’ve had them out before, trying to decide just what to do with them and, having no ideas, have put them away again. Now I think I’ll just put them into two quilt tops of whatever size they end up. Perhaps they’ll turn into covers for a few stitching books.

I have spent the past few days working on — struggling with — tearing my hair out over some designs that I’m trying to turn into designs using EQ. The designs are completely thought out in my mind, I can draw sketches on paper in seconds, and I know the designs work. But translating them from my mind or sketches into EQ designs? Not something I’m finding at all intuitive. That said, I will get this figured out before the week is over but I’d much rather be playing with fabric as I sort out a design than sitting in front of a computer screen. My EQ manual is full of Post-it notes and highlighted passages.

Baxter seems to find it all a big bore and decided to have a snooze. Notice how he makes sure he has a pillow in just the right spot!

Floral Blocks

On the weekend, I was cleaning out a small container in which I found floss, needles and these appliqued and embroidered blocks. I barely remember making the blocks and have no idea how long they’ve been sitting in there.

They finish at 6″ and, as there are about 20 of them, I think I can make a small summer wall quilt with them by adding a floral border.

Stitching with Baxter is an adventure.  He has decided that helping is something he needs to do and so he bats at the fabric when I’m piecing. He loves to help Mr. Q.O. with his cryptic crosswords by batting at his pen. We both happily put down what we’re doing to play with him.

He’s growing and getting more adventurous every day. On Monday he started to talk more in the classic tiny Maine Coon meow and silent meows. I’ve noticed the past couple of days that his whiskers seem to be getting longer, which I think you can see in this picture.

Bloggers’ Quilt Festival, Spring 2011

Amy's Creative Side
It’s that time of year again, when Amy at Amy’s Creative Side is hosting the Bloggers’ Quilt Festival.   There are all sorts of beautiful quilts entered — lots of eye candy and tons of inspiration.

I decided to show the first applique quilt I made.  It was all done by  hand — the piecing, applique and quilting.  Each plate has 20 blades, and looking at it now I realize that it has to be the scrappiest of the quilts I’ve made.  In it are some novelty prints, batiks, ’30s repros, checks, stripes and florals.

That was the first time I used a fusible batting and I remember the day I basted it — we vacuumed and vacuumed the living room carpet, laid out the backing, batting and the top and then out came the iron.  It seemed like it took next to no time and the quilt was ready to quilt.

There’s something about Dresden Plate variations that I always seem to have been drawn to.  Not only have I made this one, but also Ferris Wheel (which is about to be quilted), the new one I’ve started and showed yesterday and yet another which is in the planning stages.

Now I think I’ll spend a lot of time over the next few days looking at all the gorgeous quilts being shown.  This has to be the best way to go to a great quilt show — no travelling, no line ups, no trying to get a good view.  Just click on the links and you’re there.

Smudge continues to improve.  Here he was reaching for the toy basket in typical Smudge fashion.  He’s a very laid-back cat!

Batik Ovals

On the weekend I was going through projects.  This one has come out to be finished. It’s going to take a while as it’s all applique and I can only do a little applique at a time.  Found that out again on Saturday when I tried to do a bit too much, appliqueing about 6 of the ovals, and paid for it with hand pain the next day.  Now my plan is to applique a few each week and slowly finish them off.  What’s shown in the top photo is about a third of the total there will be when finished.

They finish at 3.75 by 5 inches and are all batiks and hand dyed fabrics.   The ones that are yet to be appliqued have been sitting in a box, already back-basted, for at least 2 or 3 years which will make the applique quick and easy.

Smudge was posing for the camera Monday night.

Works in Progress

There’s still a little hand piecing to do on the pink and cream quilt, but I am thinking now about what projects jump to the head of the queue once it and the baby quilt are finished.  Along with the Stormy Seas and Pickled Ladies quilts, the Summer Picnic Dish is definitely moving up the list.  A little more has been done since this photo was taken, but not a lot.

The POTC blocks definitely have to move up the list to be finished and the top put together.

I want to get this piece, which I’ve dubbed star of stars,  basted and quilted.  I know why it has languished this long — because I kept thinking I need to add to it and make it square or rectangular.  But I’ve decided to leave it in a star shape.

I’m going to arrange these applique blocks and get the top put together.

Of the above projects, the one that will take the longest is likely the Patchwork of the Crosses blocks.  On top of this I’m still working on getting to the point I feel confident using EQ6.

My plan for the weekend is to get the fabrics ready and printed for the Summer Picnic Dish as well as finally select the fabric for the 2″ squares used when connecting the POTC blocks and get it printed.

Smudge has a new habit.  When we empty the dishwasher in the morning, he likes to sit on the door.  I may have been a bit premature in thinking we were over the worst of this eating thing with him.  Wednesday he wasn’t interested in food again at all so we immediately went back to the syringe feeding.  I am very grateful he’s so accommodating about that process as I can only imagine how difficult it would be with many kitties.

We caught Lester in the midst of a huge yawn.  This photo makes me laugh.

Circle of Fractured Hearts

On Monday’s post, I showed a photo of one of the quarters of the applique I had done over the weekend.  Last night, I finally got up my courage and sat down at the sewing machine to stitch the four quarters together.  I was, as usual, practically breaking into a cold sweat at the thought of having to make sure my sewing was this precise, as my sewing machine skills are less than wonderful.  But, thanks to the fabulous lines that one can use as matching points, with a little careful pinning I was able to stitch the four quarters together and now have a circle of fractured hearts.   I didn’t have to frog stitch any of the seams!

The back shows just how perfectly the lines matched up.  I don’t know that I’d want to try this with anything other than the shapes printed with Inklingo, though — as I doubt I could trace anything with this kind of precision.  In fact, I wouldn’t even want to try.  But now that I’ve got this block under my belt, I think I’m going to try one of the Celtic applique designs that are available in this collection.

One of the things I really loved about this applique block was that I set the size. I could have printed a 4″ block, a 6″ block, a 8″ block but I chose to print the design in quarters and then have a larger block that finishes at 14.5″ but I didn’t have all that fabric bunched up in my hand while I appliqued.  That’s an added value for me, as my hand will begin to hurt very quickly if I’m having to hold a large piece of fabric.

I have an idea for the fall fabrics I showed a while back using Winding Ways blocks that’s begging to be made.  I’m trying to resist but it’s getting more and more difficult.  I have so many projects on the go and so many others in the ideas book that I’d like to finish at least one before starting this.  Whether I can continue to resist the siren call of those Winding Ways blocks remains to be seen!

Lester was curled up asleep on the couch, showing us the paw pads on one of his feet.

While Smudge had taken over my desk chair.

Back-Basting Tutorial — Lots of Photos

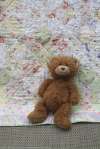
Lester is intently watching as we go through the steps I take when doing applique using the back basting process.

For back basting I use both a larger needle and larger thread.

When I do any applique, my method of choice is back basting.  I’ve found a few tricks that really help me.  First of all, I use a larger needle.  In the above picture, the top needle is a #8 straw and the bottom one is a #12 sharp.  I use the #8 straw for back basting with a thicker thread, as shown below.  And I always wear a thimble when doing this as getting that needle through some fabrics, particularly a batik, requires some protection for the finger!

The thread on the left is the normal heirloom 80 weight thread I use for piecing and applique.  The thread on the right is 30 weight DMC thread I use for backbasting.

With the applique design printed on the back of my background fabric, I pin a piece of fabric that’s large enough to cover the shape to be appliqued on to the right side of the background, with the right side of the fabric to be appliqued facing up.  Then, from the wrong side of the background and following the lines, I baste the pieces on to the background fabric using the large needle and large thread and taking relatively small stitches.  Here you can see all the pieces on the quarter block basted down.  If you click on the picture to enlarge it, you’ll see the basting stitches quite clearly on the pieces to be appliqued.

This is the back and it shows the basting following along the lines of the shapes that are printed on the wrong side of the background.

What this picture doesn’t show, and I wish I had taken one after this next step, is how flat it sits after I run my nail along the lines of basting to relax any gathers that have occurred as a result of pulling the basting thread a bit too tight.  Running a nail along the stitching line is all that’s needed to ease out those little gathers.

I’ve found that leaving a piece that’s basted overnight before starting to applique it makes the next step a lot easier.  The next day I pick up the piece and clip the basting  thread at about every 5th or 6th stitch as seen in this picture.

This next step is where the magic of this technique appears. After clipping the threads, I pull out the first one or two sections. Take a look at this picture and you’ll see the perforations in the fabric to be appliqued where the basting line was.

The fabric folds along that perforation line so easily it’s always amazing to me. With my needle, I fold it under and start to applique. I don’t look at the back again where the lines are until I finish all the applique. And every time my applique stitches are close to being perfectly on the line. The reason I leave the basting stitches in overnight is that I’ve found that it makes that little perforated line really do its job. Think of it like a piece of paper that has some perforations to make it easier to remove. I think the basting line does the same thing but, in the case of fabric, makes the fabric easier to turn under.

I begin to applique, pulling out a section or two of the basting thread as I go along.  The basting thread also serves to hold the fabric being appliqued in place.  So no fighting with pins, no freezer paper to remove, no overlay to try to keep out-of-the-way and no lines that might show on the front if the applique isn’t right on the lines of the design.  Just needle, thread and fabric.

In this picture you can see how closely my applique stitches are right on the line of the design.  It also shows the lines of another shape, which I chose not to add to this part of my applique block.

Again, another picture showing how closely the applique stitches follow the line of the design.

Everyone has their favourite method, but I hope this little tutorial gives you the information you need if you’d like to try the back-basting method.

Smudge is hoping you found this relaxing and informative.