Spectacular Sunflower, Day 3

My first sunflower block turned out as wonderfully as I had hoped.  I used shapes from both the 6-inch and 12-inch collections so that I could make the double sunflower.

While I was stitching, I was taking pictures of the continuous stitching sequence that I’m using but unfortunately none of them turned out well enough to post.   I’m going to make a second block and Mr. Q.O. will take over the photography duties so that the photos are clear.  I will post them either on the weekend or on Monday.

It presses like a dream and the block lies wonderfully flat.

The block finishes at 12″.  I’m going to make one more block using these fabrics and then play around with some border ideas using shapes from the collections.  And then?  Well, then I’m going to make a sunflower variation using perhaps some batiks or maybe I’ll make a red and white quilt.  The possibilities are endless.  I’m glad I decided to make these blocks first as it has made it easier to sort out think about the design I’ll use for a larger quilt.

Two kitty close-ups .  First Lester.

Then Smudge.

Spectacular Sunflower, Day 2

While I had hoped to get the first sunflower completed Wednesday night, we were out for a while at a friend’s and there just wasn’t enough time.  Stitching these shapes is an absolute delight!  They go together quite easily, without any issues.  Normally, I’d join the two rounds of diamonds and triangles together before adding them to the fussy cut centre.  The second round of diamonds and triangles is started, as shown.  I can’t wait to see it finished.  The fabric I’m using for the background is going to, I think, really frame the sunflower rather fabulously.

This is how the centre looks with just the one row of diamonds and triangles added.  If I were going to make a 6″ block, all I’d be adding now would be background.  However, I’m adding the further round of triangles and diamonds and my block will finish at 12″.

The back, after pressing.

Lester was looking at something I was holding just above the camera while Mr. Q.O. took the photo.

Smudge had been at the water bowl shortly before this shot was taken.  As usual, he was putting his whole head into the water bowl and then catching the water as it dripped down his face. I think if you click on the picture to enlarge it you can still see some water droplets on his fur.

Spectacular Sunflowers

Two new collections were released yesterday for Sunflower — a 6 and a 12-inch version.  With the permission of Linda Franz, the inventor of Inklingo, I grabbed the above shot, which can be seen at the  Sunflower Gallery of Quilts — it’s just one of many options shown on that gallery and they’re well worth looking at.  These shapes really are exciting to me as the design possibilities with them are seemingly endless. I know I’ll be making more than one quilt using these shapes.

As soon as the collections were released and I had a few minutes to review the Sunflower Design Book , which is absolutely fabulous, I had my fabrics picked out and had printed the shapes for two blocks.  The design book is, for now, free and is well worth downloading as it’s absolutely stuffed full of great tips about techniques to stitch a sunflower.  If you click on the above picture to enlarge it, you can see the printed stitching and cutting lines and the matching points.

I started making the first of the two circles of diamonds and triangles and can’t wait to play with the design possibilities with other fabrics.  The diamonds in this circle are .74″.   Lots and lots of continuous stitching possibilities and, of course, curved piecing.  I couldn’t ask for anything more. The ideas are just flying through my mind!

It presses like a dream too — the back of what I’ve done so far.  It’s going to be so exciting to put the first block together that I can’t wait to finish it.

Smudge was not so impressed until I sat down on the couch and he could drape himself over my legs while I started to stitch.  Then he was happy.

Lester looks as though he was studying the design, watching as I stitched.

Quilt Labels

Labels for quilts are something I look forward to making.  When I began quilting, labels seemed like something I could skip and needn’t worry about.  It didn’t take long though, before I started seeing how much fun it could be to plan a label that reflected, in some small way, the pattern on the front of the quilt.

The picture above is an exception.  It really didn’t reflect the front of the quilt but it was a label I made for a group quilt, which can be seen here.  There were a lot of names that had to be written on that label, so I took what was a placemat size and that was the label.

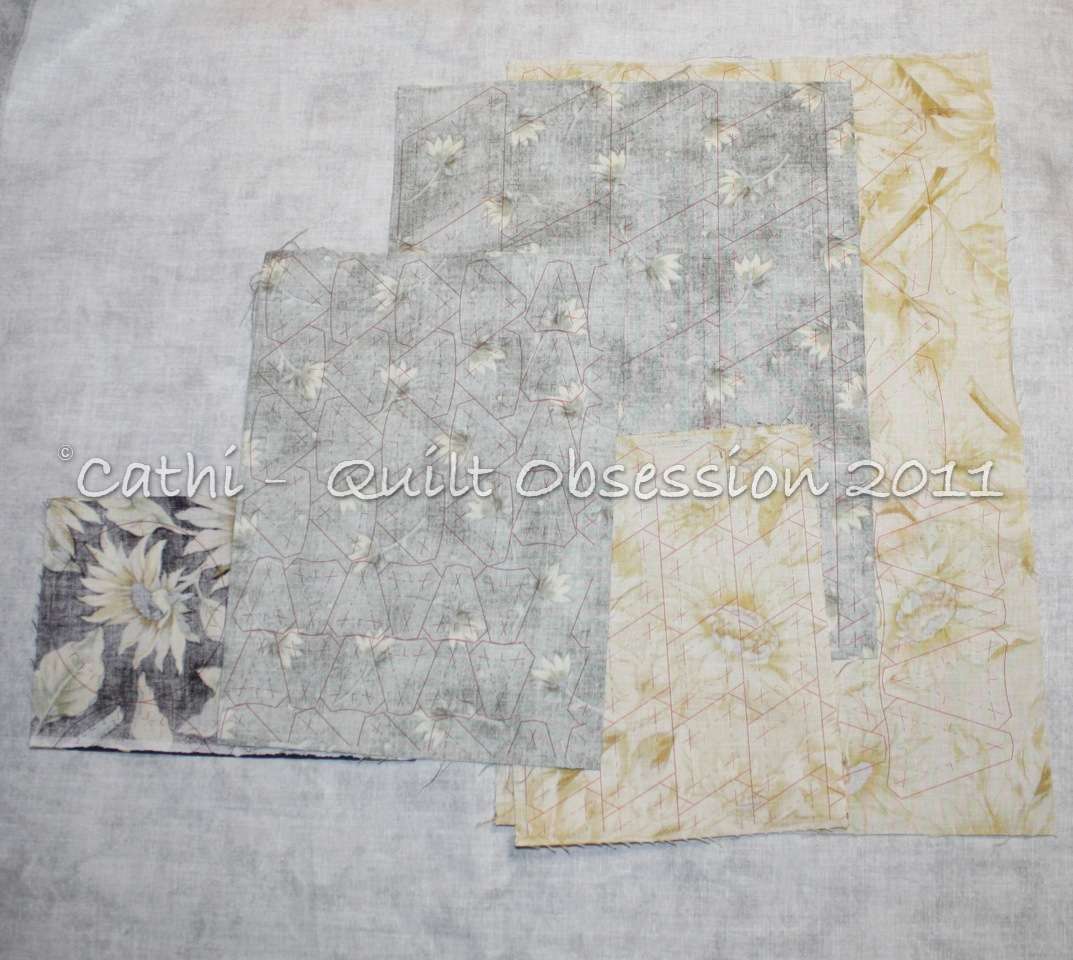
This one was done for the king-size shabby chic quilt I made using elongated hexagons and regular hexagons.  While the hexagons on the front of the quilt were all 1″, I had to use a 2″ hexagon to give me enough room to write the pertinent information and then I surrounded it with elongated hexagons in one of the fabrics that was used in the quilt.

A hexagon Christmas tree wall hanging was given to a friend which had an embroidered Christmas tree on some muslin to make the label.

This label was made for one of my favourite quilts, Chintz Circles, which was given to my aunt in August.  The fabrics and shapes used to make the label were reflective of the design of the quilt and gave me just enough room on which to write the details.

Cameron’s Windmills, which was a baby quilt I made earlier this year, was another for which I used a 2″ hexagon as the basis for my label.  The hexagon was surrounded by other half hexagons, which was the shape used to make the tessellating windmills.

As soon as Ferris Wheel is quilted and bound, I will be writing out the details on this label and attaching it to the back.  While stitching the blocks together, I was thinking about a label for the quilt and wishing I could make one more block.  The answer was obvious — make another centre and use the cream blades as the space on which to write the details.

I’ve been thinking about quilt labels a lot lately as I’ve been looking at all the pictures of the gorgeous red and white quilts that are being displayed in New York and wondering just what the labels on some of them might be.  While I absolutely love seeing the pictures of the quilts, I do wish that sometimes show organizers would take the time to photograph and display some of the quilt labels.

Do you make labels for your quilts?  Do you look at it as a chore or do you enjoy it?  If you think of it as a chore, try looking at the blocks you’ve used for the quilt and see if you can isolate one that would give you enough space to write the details you wish to include and make that one extra block.  Set it aside and then, when your quilt is done, your label is there and ready.

Rouenneries Drunkard’s Path Blocks

All the little Drunkard’s Path units were made by Sunday and I started putting them into blocks of 4.  So far I have about 18 or 20 of the blocks done, so it won’t take too long to get them finished.   I’m really looking forward to seeing this one together, and am planning the border for it already.

The weekend was one of extremes.  Extremely cold temperatures – wind chills of -15 seemed rather outrageous for late March.  Extremely different outcomes from quilt-related endeavours on Saturday and Sunday.

Saturday I started to make a large stitching book and realized that one of the applique blocks I was planning to use hadn’t even been finished.  There were still a couple of pieces that had been back basted, but never actually appliqued on.  The block had been sitting for at least 5 or 6 years.  There were other blocks, so that wasn’t a huge issue.  Cut the backing for the stitching book and cut it too small.   Pressed the backing for the Ferris Wheel quilt, started to lay it out to baste and realized I had washed and ironed the wrong piece that wasn’t the right size.  Then I got out the other piece of the backing, washed it and decided quit at that point before something else went wrong.

Sunday was a totally different story.  Stitching book put together and basted, just needs to be quilted.   Binding for the stitching book made and ready.  Ferris Wheel basted and ready to quilt.  Sorted all the little drunkard’s path units and have stacks of the 4 units needed for each block all ready to stitch.

I’ve been avoiding the computer as much as possible since Thursday.  I seem to have a pinched nerve that makes using the keyboard for any length of time uncomfortable. I owe responses to a few comments from last week still — and will try to get through them slowly.   I’m thankful that this isn’t making stitching difficult.

Smudge, sound asleep.

Lester in his newest favourite spot, under my desk.

Quilters’ Candy

These little blocks are so quick and fun to stitch that they really do seem like candy. Over the past few evenings, while talking to friends on the phone, I’ve pieced these 50 little Drunkard’s Path units.  I’m always amazed at how quickly they go together.

These are all that’s left to piece from the large stack I had two weeks ago.  I haven’t counted them, but think there’s only another 40 or 50 left to stitch.  Once they’re done, I’ll start putting them together in blocks of four units.  Then the real fun will start when it’s time to lay them out so that I don’t get the same print beside itself.

It was another cold day on Thursday but thankfully no more snow fell.  The cats found cozy spots to curl up.  First Lester at one end of the couch.

And then Smudge at the other end.

Basket Blocks

While I had the design wall up, I decided to put the 4 basket blocks up.  I now have a plan for the centre block, which won’t be another basket, and the borders for this.  I think I have just enough of the floral print to make it work .  I’m going to spend some time this weekend working out exactly how much I need for the borders and the centre block and then take it from there.

The lesson I learned from this was that when I fall in love with a fabric like this one I really do need to buy somewhat more than I think I’ll need, particularly as I had no firm plan in mind when I bought this but rather a vague idea.

It snowed.  A lot.  All day Wednesday.  So much for me thinking spring was getting closer.  It seems like a very heavy snow as the tree branches and shrubs out on the roof garden seem to be groaning under the weight of it.   Some of the bears decided it was time to get their winter clothes back on.  When the picture was taken, there were fairly large snowflakes flying by the window.

I’m not sure if Lester is winking in this shot or just not quite awake.

Smudge was relaxing.

Pink Ice Blocks on the Design Wall

While I had the temporary design wall up, I decided to throw the snow crystal blocks up and see how they looked.  This is a very preliminary arrangement as there’s some definite moving around that needs to be done.  I’m contemplating adding a 1″ sashing around the blocks and have an idea for a border that would involve half stars although no final decision is made on that yet.  If I use the 1″ sashing, I think I’ll use 1″ pink or perhaps green squares at the corners.

I was working on a Stormy Seas block on Tuesday night and realized I was constantly struggling with the thread as it was tangling frequently.  I usually use either Mettler 60/2 or DMC thread when piecing but for this block needed a blue that I had only in Aurifil.  The difference between those threads is quite striking.  Do you have  a favourite thread for piecing?  If so, why is it your favourite?

All that’s left now before I can start quilting the Ferris Wheel quilt is choosing the fabric I use for backing.  As the machine quilting is going to involve a bit of fabric wrestling, I want to use a silk batt.  I had a package of it but was a bit concerned as the package said it was 45 x 60, the exact size of my quilt, and I thought I might not have enough.  Thankfully, it is an extremely generous 45 x 60 and is the perfect size for the quilt.  The silk batt makes it so easy to manipulate the quilt sandwich and requires a lot less strength in the hands.  For me, that is an enormous bonus!

Smudge had been curled up having a snooze on the couch when Lester decided to wander over and join him.  By the look on Smudge’s face, I’m not sure he was thrilled about having company.

Label for Ferris Wheel Quilt

I decided to piece the label for Ferris Wheel on Monday.  When I started quilting, making labels for my quilts never struck me as a design element.  Now?  Now I try to make a label that has something to do with the design of the quilt.  For Ferris Wheel I decided to do the centre of a block.  The cream blades of the plate will be the perfect spot on which to write the pertinent information.

Upon finishing the piecing of a quilt like Ferris Wheel I almost always wish I could make one more block, so making a label like this seems like a great solution — I get to make one more block or partial block and the label is ready to be written on and then appliqued on to the back as soon as the quilting is done.

Lester had a snooze on the windowsill on Monday.  He had some entertainment out on the roof garden as there were some grackles and sparrows on the lawn.

Smudge was sound asleep.  Oh, to be able to relax as thoroughly as a cat!

Ferris Wheel Quilt


Thanks to Elly, I have a name for the Farmer’s Delight quilt. Ferris Wheel seems to me to be the perfect name for this quilt. It makes me think of summer and movement and that’s definitely what a ferris wheel means to me.  It reminds me of when the Canadian National Exhibition is open in August and all the rides on the midway, not that I go anywhere near them. The ferris wheel is probably as adventurous as I would ever get when it comes to rides.

It was amazingly quick work to put the blocks together into rows and then stitch the rows together. I started stitching them together on Friday evening and finished Saturday evening. All by hand.  Although I had thought I’d join them by machine, I think it probably didn’t take me much longer to stitch by hand than it would have by machine.

I thought I had the perfect fabric for the backing, but it’s just a bit too short.  All that’s left now is to do the final pressing, get the backing prepared, baste and start quilting it.  I have the quilting planned and think it will go fairly quickly.

Over the weekend, I decided to give my blog a facelift.  It’s a bit of a work in progress, but then I suppose a blog always is a work in progress.  For now, I’ve started listing favourite quilt blogs on a separate page rather than in the sidebar.

This is possibly one of the most quirky pictures we have of Lester.  I don’t know if it was the angle at which it was taken on Sunday or what, but there’s something about this one that I love.  He looks like a much smaller cat than he is.

Smudge had just been sticking his head in the water bowl, which is how he seems to prefer to drink, and Mr. Q.O. got this shot.  If you click on it to see the large picture, you can tell the fur on one side of his face is still wet.