
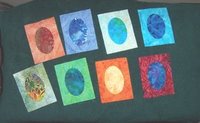
This week I’ve been working on back-basting the last of the batik ovals so they’re ready to applique. By the time the week is over, I’ll have the final 100 of the approximately 250 blocks basted. This is going to be an interesting quilt.
When I decided to start this quilt, I knew the only way for me was to use the back-basting method. So I traced the oval on to the wrong side of the batik rectangles.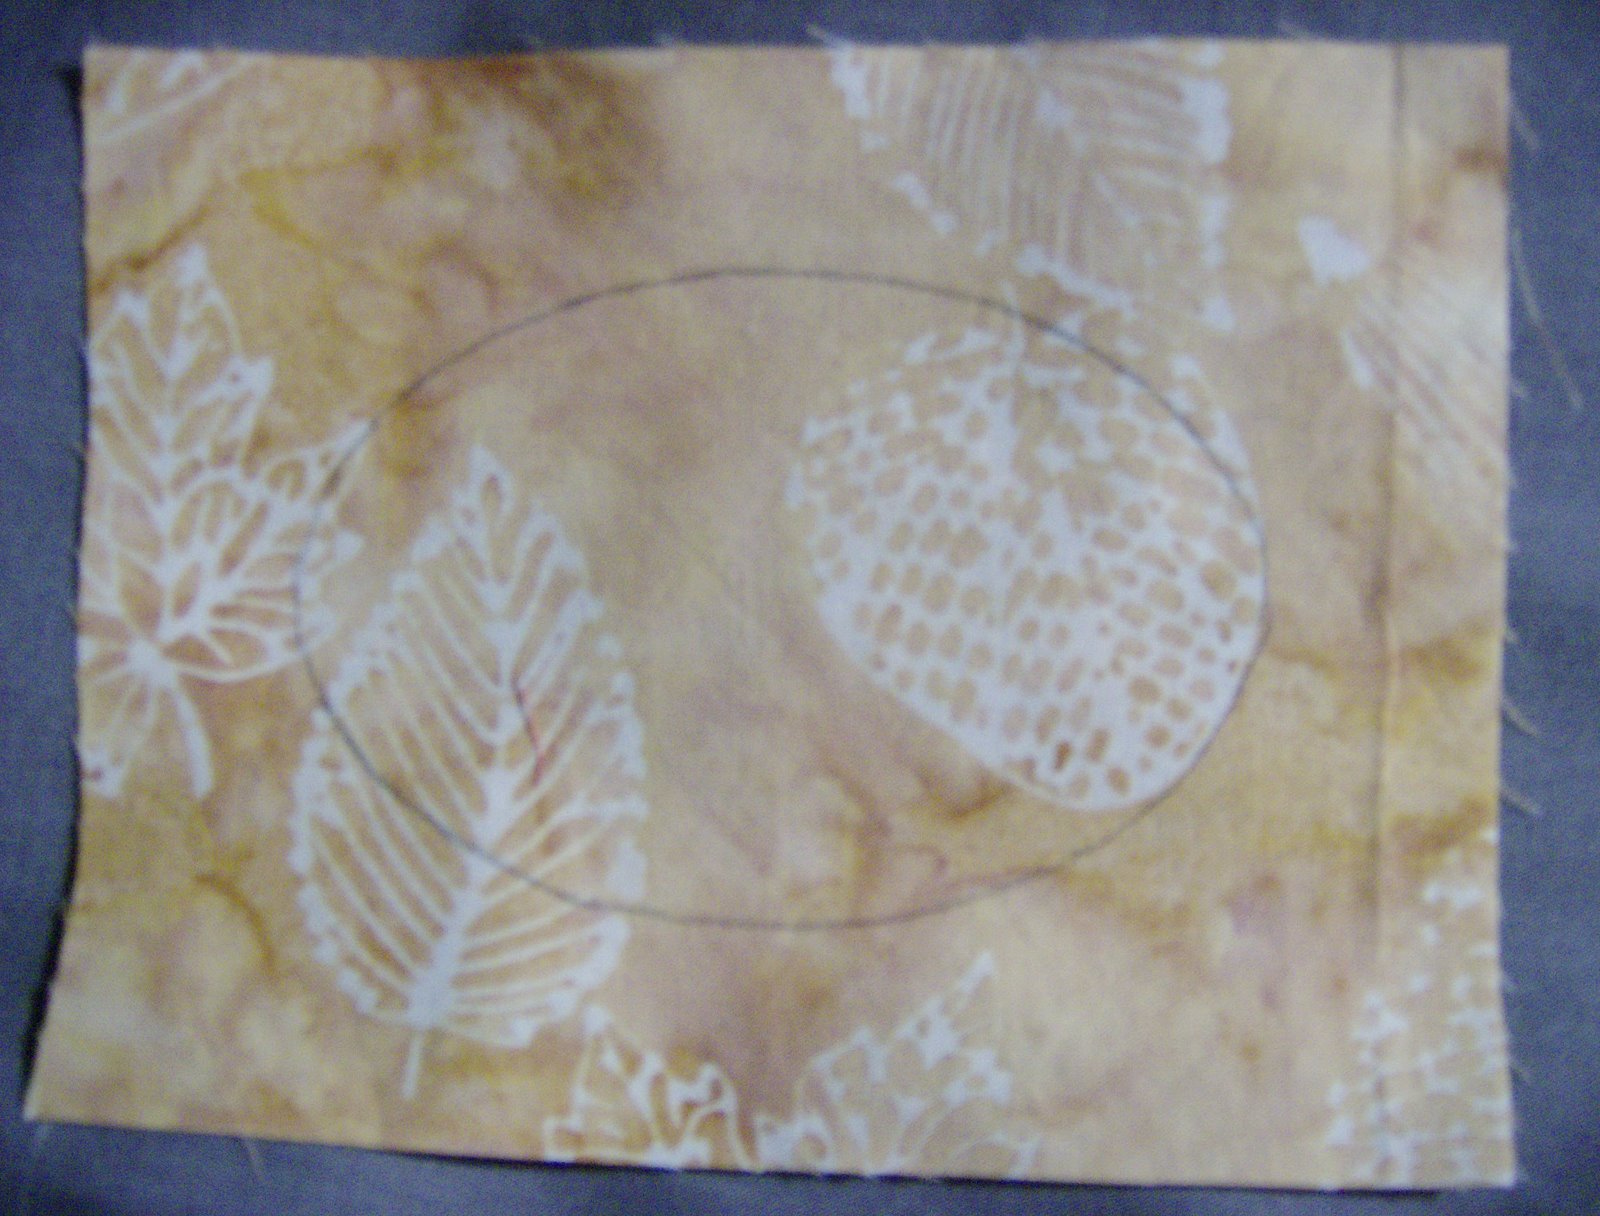
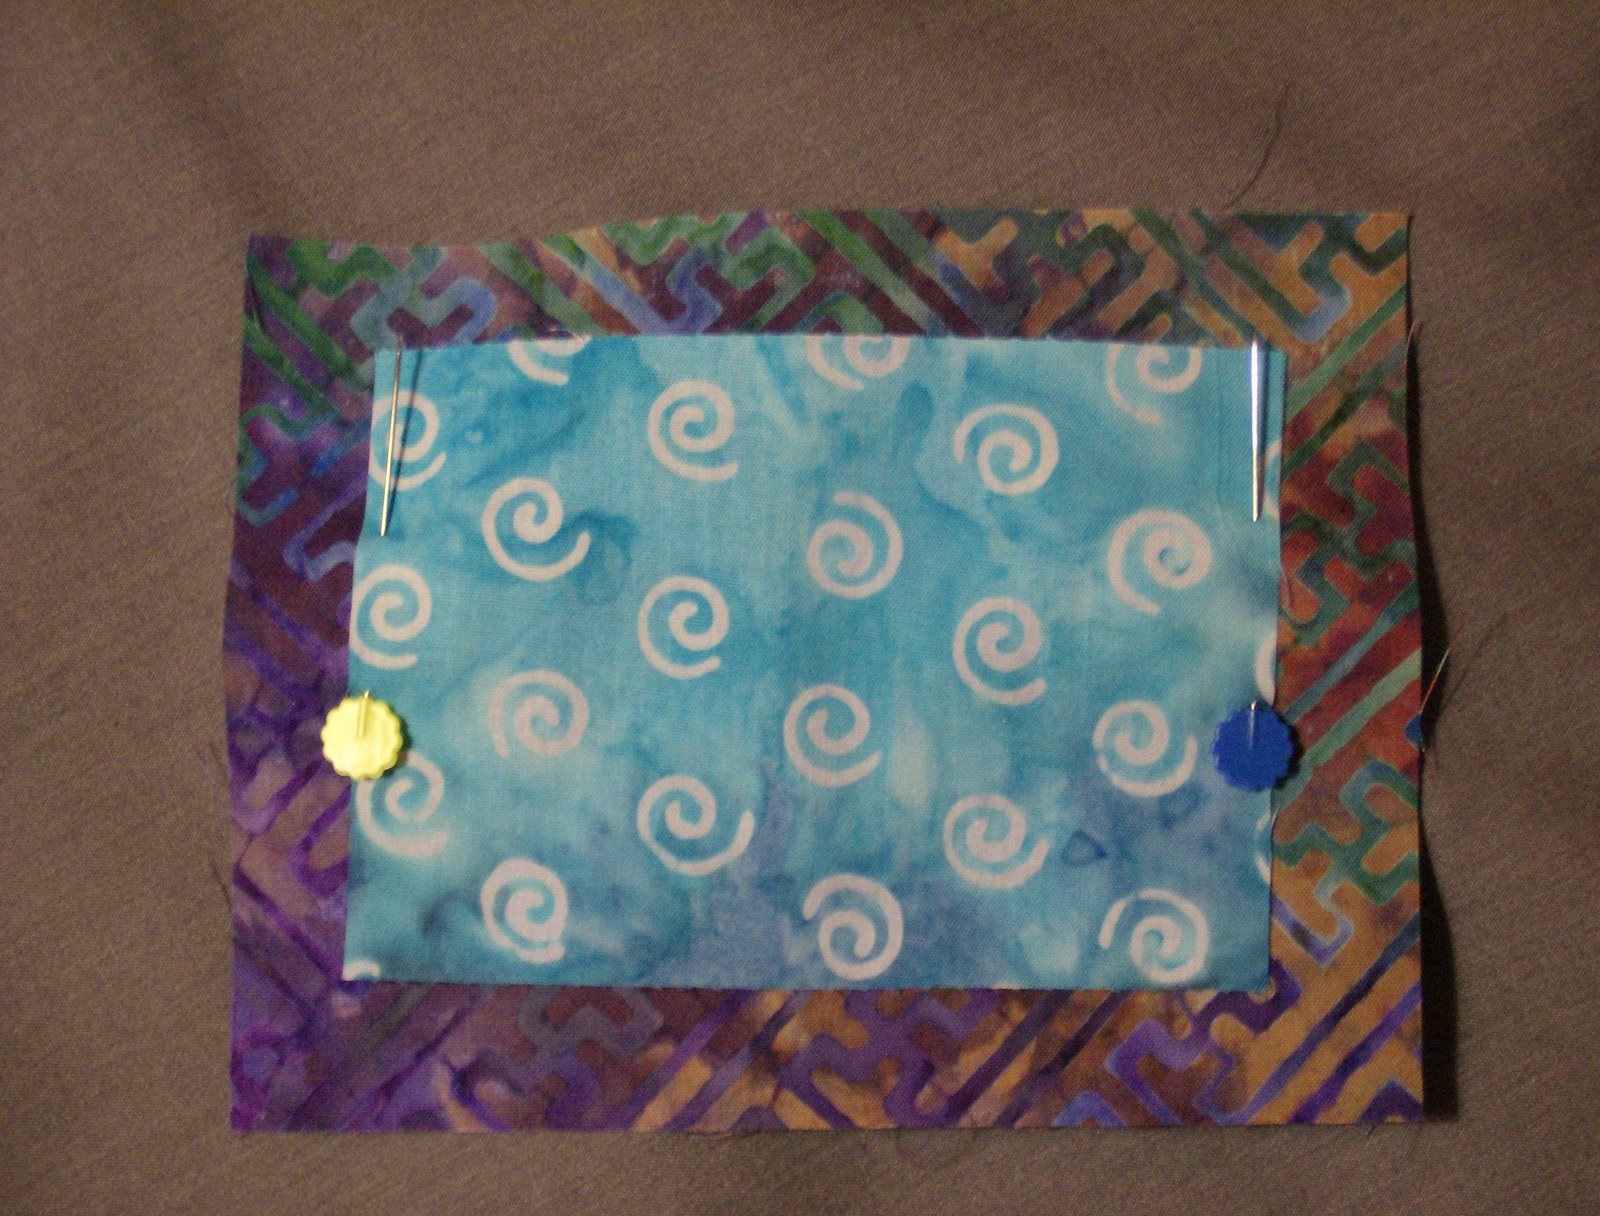
That’s it. That’s all the prep work I need to do before settling down with needle and thread other than cutting the batiks, of course. Once the tracing is done, I simply pin the smaller rectangle on.
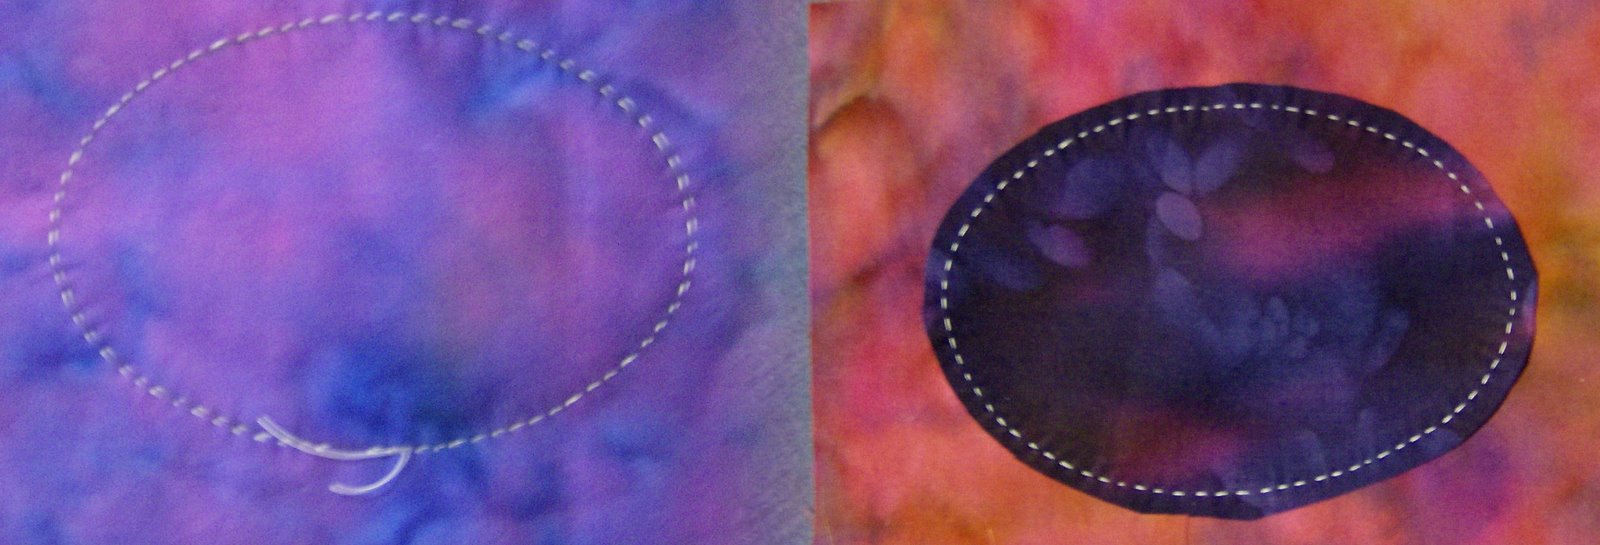
 Then I baste, working from the wrong side and following the traced line, using small stitches, button thread and a slightly larger needle than I would normally use. Once the basting is done, I cut the piece to be appliqued to a rough 1/8 of an inch turn-under allowance and generally let the piece sit for at least 24 hours, although frequently that time is much much longer. This picture shows the back and front of 2 blocks basted and ready to stitch.
 When I’m ready to start working on a block, I simply snip about every fourth stitch of the basting. I pull out the first couple of sections of thread, start to applique and it’s magic. Because of the perforations from the basting, the piece to be appliqued turns under right on the line. This is the best applique method I’ve tried. I get great placement, even on complicated blocks with lots of pieces to be appliqued, and there’s no fiddling with freezer paper, pins or glue or dealing with an overlay that has to be rolled up and held out of the way.
It’s always amazing to me, when I turn a block over after it’s completed, and see that my applique stitches are exactly where I had traced the shape. All one needs to do is take the time to trace the pattern as carefully as possible. If your basting stitches are right on the lines you’ve traced, the applique will be as good as your tracing was. Pure magic with very little effort!
And, for the requisite kitty photo, Smudge treated us to yet another of his poses.


Those batik blocks are gorgeous! Should be a lovely quilt. 🙂
LikeLike
One of these days I’m going to try out that method of applique *s*
LikeLike
Excellent tutorial of this method. I almost think I could do it because I understand it. The pictures are really helpful.Today Smudge cannot have a kiss. No kiss. A scratch though, I thought a scratchy would be nice. Long Distance Love, *karendianne.
LikeLike
Great tutorial…I really must have a bash at this…Smudge looks cute as ever…
LikeLike
Thanks for the terrific tutorial. I’ll have to try that method of now that you have explained it so well.
LikeLike
I love new techniques — and this one is certainly new! Can’t wait to try it. Thanks for sharing and doing such an easy to understand tutorial on the technique.
LikeLike
I have to try your method Catherine. Applique always scares me and I avoid it as much as I can. Thanks for showing us.
LikeLike
Thanks for showing this! I’m going to have to try it out in my next applique quilt.
LikeLike
This technique for back basting looks so easy! I can’t wait to try it on some of my Dear Jane blocks!
LikeLike
This is absolutely helpful! Thanks, Cathi…. I am going to try it out.
LikeLike