Warning — lots of photos in this one so may be slow to load.
I’ve been asked a couple of times about the stitching process for hexagon flowers the Inklingo way so thought this little pictorial tutorial might be a better route to go than trying to describe it in words. The method is one I learned from Linda Franz. Both her Quilted Diamonds books and the Inklingo product have wonderful instructions that make this and other methods incredibly easy to learn.
Edited to Add: All the hexagons for this project were printed using Inklingo , which prints very fine cutting and stitching lines as well as matching points in your choice of many colours on the back of your fabric. One always gets perfect precision when stitching as a result.
Lester’s peaceful countenance should help put you in the mood for some calming hand piecing.

This flower will be made with 6 one-inch hexagons of one fabric and 1 one-inch hexagon of a different fabric in the centre.
Materials needed: six hexagons for outer circle of 6, one hexagon for centre, needles and fine thread.
I use #12 sharps as both needles and as a pin as they are so fine. My “pin” goes right in at the cross-hair at the end of the little seam. I use YLI Heirloom, YLI Select, DMC or Mettler 60/2 threads for hand piecing and do try to match my thread colours as much as possible to the fabrics I’m using.
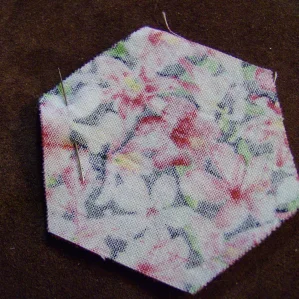
Here I have the first two hexagons of the outer 6 pinned together.

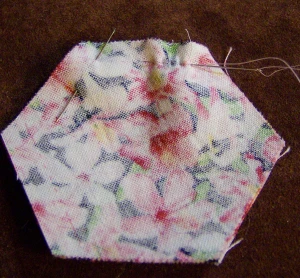
Then I start my seam. I make a quilter’s knot and then use this little trick I have found which helps make it easier when I get to the continuous stitching to attach the centre later. I insert my needle from the front, just a tiny bit over from the cross-hair on the right (I am right-handed) and come back up from the back right in the cross-hair. Then I immediately take one very tiny stitch, which serves as a back stitch and then a load of 4 or 5 running stitches on the needle. Pull the needle through, take another little back stitch and load up the needle again.

Now I’m at the end of the first little seam. Finish the seam right at the cross-hair and then take another back stitch, turn the piece over and take another back stitch through the opposite side and make my quilter’s knot to tie off. This way I have no knots right at the intersections, which I have found does help later on.

Because I was using very fine YLI Heirloom in a pale pink for this flower, it is almost impossible to see the stitches on the fabric. Just to give you an idea, here is a shot of the blue and white fabrics of the Texas Star quilt — I stitched that with DMC blue thread which you can see on the white hexagon in this photo.

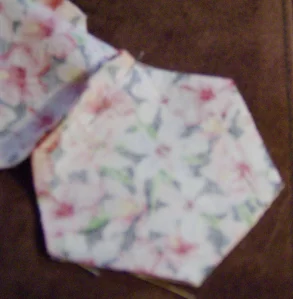
Here are the first two hexagons stitched together.

Now attach the third hexagon in the very same way, stitching from cross-hair to cross-hair.

Half the outer circle of 6 hexagons is now complete.

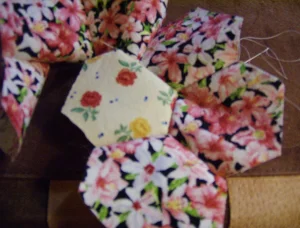
Finally, the 6 hexagons of the outer circle are stitched together all but for the final joining seam, which gets stitched after these are stitched to the centre hexagon.

Now it’s time to start joining the outer circle to the centre hexagon. I pin the first of the outer circle hexagons to the centre one right at the cross-hair and start another little running stitch seam, again with a back stitch.

When I get to the end of that first little seam I take a little back stitch and, rather than knotting and cutting my thread, I just continue on by inserting my needle right through the cross-hair of the seam and then starting to stitch the second hexagon of the outer circle to the centre hexagon. I continue that way right to the end, never having to break the thread. Continuous stitching like this makes putting a hexagon flower together very quick. This is the reason I like to try to avoid having my quilter’s knot right at the cross-hair — it makes it easier to get my needle through the seam and start the next seam.

At this point, I have half of the outer circle of 6 attached to my centre hexagon.

I have now finished joining all 6 of the outer hexagons to the outer circle and all that is left to stitch is the final seam between the first and sixth of the outer hexagons. Once again, I pin through the cross-hair and stitch right to the end.

A completed hexagon flower all done with a running stitch. Simple as can be. No cutting out or buying commercial papers or basting or whip stitching. Just a nice simple running stitch and lots of wonderful continuous stitching.

This is the back of my little hexagon flower, ready for pressing.

Because I was stitching this late at night and because hand stitching means one can leave pressing to another time, I have these two photos of hexagon flowers made using .75-inch hexagons that have been pressed. You can see how the seams are pressed to distribute the bulk.


Making GFG flowers this way is so quick and easy and incredibly addictive!
Now, Lester wants to know — was this a calming experience?


Wow, Cathi. Great tutorial. I’m sure others will think so too. I am looking at the sample you sent me and it’s all making sense now. Thanks for going to so much trouble.Christine
LikeLike
Very nice tutorial, and yes, very helpful. Hope I can remember it when I decide to make a quilt like this.. someday.
LikeLike
Very nice! I bought a set of hexagons a month ago (because I am template challenged, lol) and your tutorial will be a great reference!
LikeLike
I have not seen it done like this before. I don’t think I would be as accurate as you. I am making a GFG but doing it the old way.
LikeLike
I applaud your determination to do the hexagons this way – and good tutorial. I made one GFG doing hand piecing, but I’ve switched to English Paper Piecing http://tinyurl.com/3rs7shand find it more to my personal taste. The cutting and basting takes a little while – but the points are exact and each seam the correct size – something I personally need help with.Great Blog and tutorial – can’t wait to see your quilt.
LikeLike
I have both of her books, I am still not quite ready to try hand piecing. (I have one of Jinny Beyer’s books too…) Maybe subconsciously my brain is telling me to finish my hand applique projects first…
LikeLike
Lester, tell mommy is WAS NOT A CALMING EXPERIENCE! Now she tells me that’s how to do it. Now? After I already struggled with my little mini hexagons. HUMPH! :)(I love this photo of Lester)Handsome Love, *karendianne.
LikeLike
Wonderful tutorial! I keep thinking I need a hand project to take with me, and one day I will give it a try. I absolutely LOVE the back — so satisfying when it all lays flat!
LikeLike
You make a wonderful tutorial . . . even I can keep up *s* Still not quite ready to give up my ‘training wheels’ (English paper piecing) Maybe when I finish my current EPP project, I’ll give Inklingo a whirl.
LikeLike
Great tutorial Cathi! I’ve never heard of the Inklingo way…I’ve been hand-stitching my hexagons on and off for the last 2-3 years. It is a great drag along project for when I have no other hand-piecing to drag along. 8-)I drew my stitch-lines on my fabric using a template, and cut them all out with scissors. I press them the same way as you do. So far thats worked for me. 8-)I am curious to give the English Paper Piecing method a try at some point…Happy stitchings! 😎
LikeLike
Great photos fantastic tutorial…well done Cathi and Lester…
LikeLike
Thank you for the tutorial, Cathi. Maybe one day I will have enough guts to attempt a hexagon flower quilt. I have always admired these types of quilts.Aloha!
LikeLike
Thanks for the tutorial. I have always love the Grandmothers Flower Garden pattern, but was too afraid of hexagons to atempt it.
LikeLike
I have always LOVED Grandmothers Flower Garden — I never tried it though because I always thought it would take me a long time to get a quilt completed. But I am definitely enjoying looking at yours!
LikeLike
Great tutorial and I was very interested to see how you pressed the backs of those hexagons. Thanks for sharing.
LikeLike
What a great, clever tutorial ! THANKS, Cathie :)Aaah, although being addicted to the EPP method, you’re tempting me again with that quicker Inklingo method, and I can already figure myself swapping lots of hexagons. What fun it would be, indeed ! (see how I’m easily diving ? LOL LOL)XOXOXOXOXONADINE
LikeLike
this is a great tutorial Cathi, thank you for taking the time to make it. also thank you for the tip about the knots at the cross hairs…off to print mine off now, cheers and hugs Elly
LikeLike
I didn't understood all the words so I have to read it some more times, but I think its a lovely idea not tu use paper templates. Crosshair? didn't understand that and don't know what a quilters knot is, but I am going to do some research and be back again. Thank you for your tutorial!Ann-Christin in Swedenhttp://ann-christin.zoomin.se/galleri.html
LikeLike
What a great tutorial. Thank you so much and especially for the tip about not having the knot in the exact crosshair point thus avoiding needle problems when you put in the centre hexagon. Very, very clever! Will come back here when I want to start my GFG quilt.
We have a biennial National Festival in a different major centre every two years. Next year it will be near Cape Town and 4 years later here in Port Elizabeth. We have quilting teachers from abroad and it would be great if Inklingo could join us in 2017.
Gail in South Africa where I am spreading the word about Inklingo from Port Elizabeth.
LikeLike
You are a great teacher I just hand piece because I cannot sit for long periods of time. Grandmothers garden is my absolute favorite pattern. I’m have put off making because of number of begIns needed. Will 2 1/2 ” blocks be ok for these 1″ blocks. I have to buy them can’t bend to cut. That is why I ask. Thank you so very much h it has inspired me to try this method. Xoxox Carmen.
LikeLike
Thank you! I’m sorry it took so long to respond. Inklingo makes hand piecing these oh, so easy – so I hope you do enjoy using that method.
When you say 2.5” blocks, if you mean 2.5” squares to cut the hexagons from, that would work. If I misunderstood, please let me know.
LikeLike