

While I was making the butterfly and wild floral kaleidoscope stars, I had to make a few more of the little mauve and pink kaleidoscope stars. It’s impossible to make only one.

Or two.

Each seam is only 1.25″, so they go together in no time!

I’m trying to make sure that I will have a balance between those with pink in the centre and those with either green or lilac centres.

It’s hard though, because pink is my favourite colour.

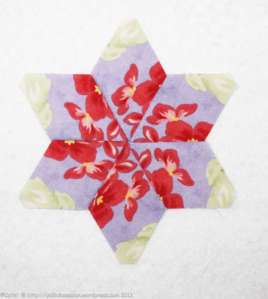
For this one I could have easily turned the diamonds the other way and the little star would have had a totally different look.

One thing these kaleidoscope stars have taught me is to look at fabrics totally differently.
Clearly I need an intervention.

Because …

… I can’t …

… stop making these! Using Inklingo to print the diamonds on my fabrics means no waste and stars that turn out beautifully every time. That makes it very, very difficult to resist going through my stash to find more fabrics that are suitable for kaleidoscope stars!

“Go Cards!” The kitties and their shape-shifting alien buddy are cheering for the Cardinals.

Baxter and one of his toys. He was stretched out like this for quite some time with the mouse on his back before he moved.


LOL – you are addicted!
LikeLike
I am loving the mauve stars too!!!
Thanks for your kind words on the ornament. I think the 4 calling birds is my favorite so far. 5 golden rings, my next one, is not my favorite.
LikeLike
You are totally Star stuck! LOL!
LikeLike
They’re lovely. I can see why you’re hooked.
Great pic of Baxter. He’s a funny little boy
LikeLike
Adorable stars Cathi. How are you getting six diamonds in the exact position to make your Kaleidoscope stars using Inklingo?
LikeLike
Thank you! It is very easy to print identical diamonds for the stars. Linda Franz did a couple of tutorials on the All About Inklingo blog on how to print the identical diamonds that can be seen in the August 14, 2013 post and the August 16, 2013 post.
It works like a charm. I’ve now printed loads of diamonds on two-yard cuts of four different fabrics for four different kaleidoscope star projects with no waste at all. Having perfect cutting lines, stitching lines and matching points makes the whole process such fun. And it takes no time at all!
LikeLike
Thank you Cathi. I have made these blocks with the “one at a time method” 🙂 so look forward to trying this method. Now I have to go find the video that tells me how to print 2 yd cuts as I assumed the patterns would print on 8 1/2″ x 11″ pieces that would go through my ink jet printer.
LikeLike
Love them love them love them
Oh Baxter has a mousy mousy…
LikeLike