The block that has 112 pieces is finished. Baxter was inspecting it. It’s a variation of the Flying Swallows block, measures 10.86″ finished and was made using shapes from the Inklingo Free Diamond Square Triangle Collection. If you have the Free Collection, this is the block shown on page 23. Putting 4 or more of these blocks together produces a fabulous secondary pattern. It could also be made using the shapes in the 6-inch LeMoyne Star collection.
It’s easier to make than it may appear and is composed of 3 distinct units.
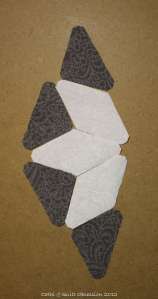
The first unit is composed of 3 white diamonds and 4 grey QSTs. Eight of these units are needed for each block.
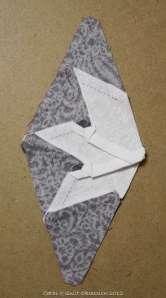
Once stitched, they will form a large diamond.
Pressing them all the same way helps when putting the block together.
Laying the units out on a stitching book is helpful to ensure the QSTs are placed properly.
Once the 3 diamond segment of unit 1 is made, the QSTs can be attached with one thread. This diagram shows the continuous stitching path.
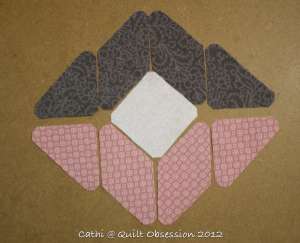
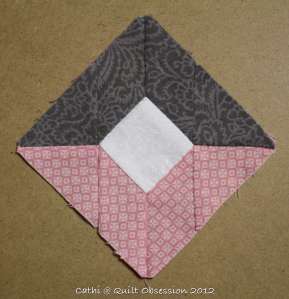
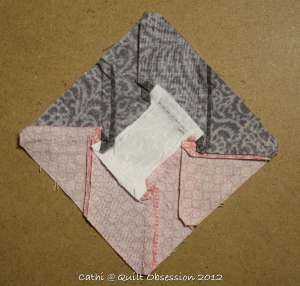
The second unit is composed of 4 diamonds (2 each of pink and grey), 4 QSTs (2 each of pink and grey) and one white square. Four of these units are needed for each block.
Once stitched, they form a corner square.
Pressing them all the same way helps when putting the block together.
The third unit is composed of 2 pink diamonds and 3 QSTs (2 pink and one grey). Four of these units are needed for each block as well.
Once stitched, they form a large setting triangle.
Again, pressing them all the same way helps when putting the block together. Grading the seams helps reduce the bulk.
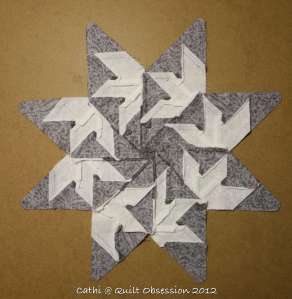
Once all eight segments of unit 1 are made, lay them out to make a large 8-point star making sure that all the swallows are going in the same direction.
After stitching the centre star together, they will look like this.
Press and grade the seams.
Lay out the centre star with the square and triangle setting units.
Then it’s just a matter of stitching the setting pieces to the centre star and is another opportunity for some continuous stitching.
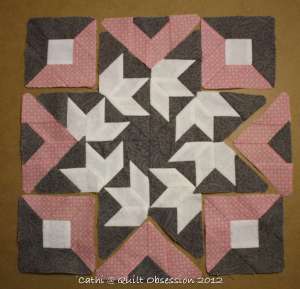
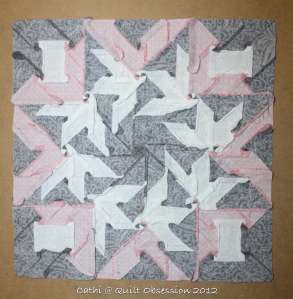
When finished, the block will look like this.
Pressed and seams graded.
The block is much easier to stitch than it appears and it’s fun to see the design taking shape. Would I make it again? Absolutely! But I’d use batiks as they would help cut down on the bulk, would press fabulously well and the effect would be, I think, stunning.
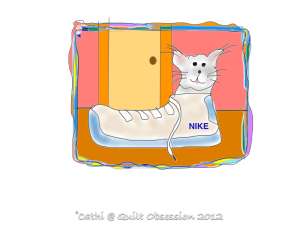
Today’s Baxtertoon is inspired by the next photo.
Baxter really doesn’t like it when Mr. Q.O. goes out and is often seen guarding his shoes.








That is a spectacular block! I agree with you about the batiks and that they do just press so nicely. Aren’t they more difficult to needle through by hand?
LikeLike
That’s an interesting block, how big is the finished size? Baxter is definitely taking his guard gat duties seriously…..first your block, then Mr Q.O.’s shoes!
LikeLike
The directions state the finished block is 10.86″, Jennifer. Cheers!
LikeLike
Well I’m totally gobsmacked! Blown away!! This block is gorgeous Cathi and this is such a brilliant tutorial!!! Loved seeing the progression of the block in the making 🙂 Thank you for taking the time to take all the pictures :)) How long did it take you? Was it not yesterday that you just printed out the pieces? You sure do stitch very fast!! It would have taken me one evening to make one or two units only, but then I’m exceptionally slow. LOL… Loved the Baxtertoon and the pic of him guarding Mr Q. O.’s shoes :)) Elly
LikeLike
What a gorgeous block!
LikeLike
Great tutorial and beautiful block Cathi, thanks!
~Jillian in North Dakota
LikeLike
Great block and I appreciate the tutorial!
Baxter is quite the guard! He knows he has to take care of both of you!
LikeLike
Excellent step by step tutorial! Thank you….!
LikeLike
Absolutely beautiful blocks, Cathi I have always loved the swallow designs, and now I really want to make one. Thanks so much for taking the time to write this wonderful tutorial.
LikeLike
This block can also be sewn by machine thanks to the lines printed on the fabric. Either way, it’s gorgeous! Thank you, Cathi!
LikeLike
You do break hard blocks down to where they really look possible, thank you for your details! I haven’t said hi for a bit, so I wanted to, and to say Baxter is really a beauty, Cathi. I enjoy your sharing of him, and Mr.Q.’s toons!
LikeLike
Cathi – you are a master at writing tutorials. Thanks so much for taking the time and effort to explain the process. Boy does this block have “showstopper” effect – it looks soooo much more difficult than it really is. Hope you plan on making lots more – I can’t wait to see how they look together!
LikeLike
Great tutorial thanks so much!
LikeLike
very, very nice. I’ll have to read more of your blog & hope you have more of these tutes for using inklingo.
LikeLike
We love the Baxtertoons!!
LikeLike
Beautiful block! Thanks so much for taking the time to share your tutorial! You make it look easy!
LikeLike
I have seen this block under a different name but can’t think what it was – pretty!
Karen
LikeLike
Great looking block. What are your plans for it?
LikeLike
that is quite an amazing block!…..and great fabrics …it will be a beautiful quilt
LikeLike
I love how blocks evoke their name!~and this is one of them!
Look at them flying with the wind… so pretty!
I love Mr. Q.O.’s Baxtertoons! lol
They really make me smile.
LikeLike
This is a fantastic block, Cathi! (Just got back from San Francisco, and am catching up!) Please send me Baxter.
LikeLike
Cathi,
Hi,I just wanted to say thank you for the tutorial on this block. I do have a ? for you,how would I write up a cheat sheet for this block? I have a mental block write now. I am using gray with dots for the background,pink fabric for the diamonds and also gray fabric for the diamonds. Any help with this is greatly appreciated.
Thanks,
Peggy S
LikeLike